Showing posts with label diy. Show all posts

Saturday, June 29, 2013

"Boy" Vinyl Wall Decal


I found this cute wall decal idea on pinterest and thought it was perfect for filling up a big, empty space over the boys' bed. I had found vinyl decals at Hobby Lobby that I liked, but they were more than I wanted to spend. Plus, they were limited in the phrases and fonts.
I wanted something fun for the kids.
Thank goodness for the Cricut! I had a friend that talked about cutting vinyl, and it could stick right onto the wall. I finally went on eBay and bought some sheets of vinyl to try this out. I love it!

Bow and Headband Board

 
Newborn girl = lots of bows! I had a drawer full of them and needed a way to organize them. I had seen the bow holders that had ribbons hanging down with the bows clipped to them. That style didn't really fit what I was looking for. Plus, I had all these headbands for the bows and headbands with flowers, and they wouldn't go on the ribbon holder. So I went to my trusty DIY site... pinterest!
 
I've seen these boards before to hold photos, cards, messages, etc. Basically a board covered with fabric and ribbon woven across. Some had little hooks on the bottom to hold the headbands... genius!
 
I thought about putting the fabric around a piece of plywood, but I ended up finding a spare canvas board. I intended it for a painting project... I brought it home from a moms craft night. I found some girly fabric that would match the nursery (I didn't have enough caterpillar fabric to cover the board. Otherwise, that would have been perfect!). I had tons of ribbon, and left over curtain hooks. I just stapled the back of the fabric and ribbon in place. The ribbon was a little too flimsy for me. When I put bows on, it started to sag. I sewed buttons on where the ribbon crossed, and that helped keep the ribbon in place.

Cost to make a bow board? Free! I was able to used scrap fabric and craft items already in my inventory. I even had extra hanging hardware that I nailed to the back of the canvas board.
It looks perfect!

Saturday, May 18, 2013

Masterpieces, Kids' Art Display


I saw this idea on a friend's pinterest board and thought it was such a great idea to display the kids' art. Before, I was taping it up on the wall, and they would get ripped. I able to make these display rods from curtain rods we were donating to the Goodwill (a couple dollars I think from Lowe's). They were too thin for our heavy curtains, but just perfect for a wide spread of art work! The costly part is buying the curtain clips. I found them in the bath or curtain section, but they were like $7 for a pack of 7. And I wanted at least 2 packs. I will probably add more later...
 
I saw this "Masterpieces" wall decal on pinterest as well. I was able to cut vinyl with my Cricut and copied the style I pinned. It turned out great!

Thursday, February 28, 2013

Leap Pad Case


 In the age of technology, kids are so tech savvy at such a young age! Every time we went into the toy section at the store, our oldest son would gravitate towards the Leap Pad (which looks just like an iPad), and he knew EXACTLY how to navigate it! I checked out the games that came with it. Many of them were educational. So we got him a Leap Pad for his 4th birthday.
 
At first, we got him just one game. Then for Christmas, we bought him a second game. Then we had a problem, what did we do with the little game cartridge when it wasn't in use? It looks like a memory card, and I didn't want it to get stepped on, lost or damaged. I looked up carrying cases online and they were SO expensive (for my taste anyway).
 
I searched pinterest (LOVE!) for some kind of homemade case and found a tutorial, found here. I was able to use fabric and velcro that I had left over from a blanket I made from a friend. The fabric called for interfacing, and I was like "huh?". But I had some upholstery fabric that I used in placed of it. That was a mistake! It ended up being so thick and stiff. And there'ss many layers to sew through and lots of flipping inside out of fabric. Batting would have sufficed, or a few layers of scrap fabric. The only thing I had to buy was a zipper, .99 cents!
 
 This turned out adorable! It's the perfect size for his Leap Pad and has a pocket in the front to store his games. Perfect for traveling and storing everything!

Valentine's Cards for Kids


I always call myself cheap, but my friends affectionately call me frugal. Whatever you want to call it, it's caused me to be very creative and crafty. I don't like to waste anything, and I especially dislike spedning money on things that are so disposible.
 
 Valentine's day was coming up, and we didn't have any big plans. The kids especially enjoy storytime at the library and they were having a Valentine's day party. Ms. Sherrie suggested bringing cards if we wanted. I thought, "no, I really don't want to go and buy cards for like 4 or 5 friends and throw the rest away". Plus, I didn't want to have to make a special trip to the store to buy them.  
 
Cricut to the rescue! I let the kids pick out their own characters to put on their Valentine's. I looked up some cute Valentine's day phrases and used scrap cardstock that I had in my stash. I have a thick pad of paper for my own scrapbooking endevors, plus all the paper for my etsy store (which can be found here).
 
 Ethan picked the zebra (which HAD to have the flower because that's the way it was in the picture!) And Euan picked the penguin :) 

Crochet Headphone Covers

 
SO!!! Last year we went on a trip and took the DVD player for the kids. At some point we looked back and the foam pieces of the headphone covers were missing. Looked at my 2 year old, and the evidence was in his mouth! He ate them! This was our 3rd pair of "cheap" headphones for the kids, and they are NOT cheap! $5 a pop. They get lost, stepped on, etc. But I was not about to replace these AGAIN!
 
Searched for some covers to buy or make, and voila! Found these on ravelry.com (my favorite knit and crochet site for patterns!). Was able to make these with some yarn I had on hand and just in time for us to go on vacation. Original pattern by Jennifer Ofenstein, and found on her blog here.

The Very Hungry Caterpillar Burp Cloths

 
Got a dozen regular cloth diapers from CottonBabies to use as burp cloths, found here. These are $1.75 each and they ship for free! Retail stores often sell cloth diapers too, like BabiesRUs, WalMart and Target. They are Gerber brand. I've heard that they work well as burp cloths, but I know the ones from CottonBabies are diaper service quality and SUPER SOFT! And they are actually cheaper than the gerber ones! You can buy as many or as little as you need.
 
Bought some caterpillar ribbon off of etsy and sewed it to each end. I did 13" strips, folded and tucked in the ends of the ribbon, and did a top stitch around the ribbon edges. They turned out so cute and will be perfect for new baby!
 
This would make a great gift too! I bought an extra 3 diapers and am going to make personalized diapers for a friend. I think she'll love them!

Thursday, October 18, 2012

Padded Camera Strap

 
A friend of mine suggested that I put a padded cover on my camera strap. For comfort, and for fashion :) I never heard of such a thing, but it made sense. The strap did sometimes irritate my neck. Plus, it would add some flare to my camera! I bought about a 1/4 of a yard of fabric. There was a decent amount of excess fabric, but it didn't cost much. I probably could've done an 1/8 of a yard. But better to have extra than not enough! Also, I used leftover batting from Christmas quilts.
 
Sandwich the batting inbetween the fabric, folded wrong sides together, and with the fold at the top. It should look like a rectangle. Usually the fabric is about 45 inches wide, so I just folded it down and it was about the length of my strap. I would suggest spray basting, but I didn't have any. I had to pin, and it never came out perfectly flat. But it was good enough for me.

<  Sew lengthwise on both sides. You will be sewing these sides together later, but this will just keep the batting in place as you work with it.

At the bottom, cut the batting a 1/2 inch from the edge. Then fold the edge in and press, with one side of the fabric covering the batting 

Once you fold and press both sides, it will look like this.

Sew on edge down with the batting.

Do a blind stitch to sew it up.

Fold it over your strap for size. Pin and cut excess fabric.

< Sew together and seal with a zigzag stitch. Flip it inside out. Done! Comfortable, fashionable, I love it!


Cat in the Hat Costume Tutorial

I searched on pinterest for costume ideas for the Cat in the Hat. I found a tutorial for the hat, but nothing for the costume. It looked fairly easy though... so I used my favorite costume as inspiration and set off to make a costume.
 
Have I ever mentioned that I can be cheap?! Many put it delicately, and say I tend to be frugal. Whatever the word, I wanted to make these as economically as possible. Using things that I already had or could buy for cheap. I saw costumes at ToysRUs for $30 a piece! And they wouldn't even fit the kids. I used lots of things I already had and bought a few pieces of material and a plain black shirt. I think the total cost of this costume was under $10.
 
Hat
I found a good tutorial on pinterest, which led me here. I changed the color pattern to match the Cat in the Hat book. My son is especially particular on details like that! I couldn't figure out how to attached the hat to the brim. I did something crazy, I'm sure. But it's attached and wearable! On the brim, I cut out a ring that was sandwiched inside the brim. I didn't like how floppy the brim was by itself. I have some mesh plastic canvas (available at the craft store) that I used in a knit hat with a brim. Works great! and it's washable too.
 
Shirt
I didn't have it in me to make a long sleeve shirt. I had plenty of black fabric, but I thought a $3 shirt from WalMart was worth it! I used white felt (from the hat) for the belly. Cut an oval shape for the belly and pin. I did a single stitch around the edge and done. You can probably do a zigzag stitch around the edge too. This will probably launder better.
 
Bow Tie
I'm sorry that I don't have pictures for this part! I did it in parts over the course of a couple of days, sick as a dog, and I just spaced on grabbing some pictures. But here's the jist. I used red felt (from the hat) and free handed a basic bow tie shape. I used the book as a guide. I also free handed the piece of the bow tie hanging down, because I wanted to make that separate and attach it later.
 
I sewed along the outline of my bow tie on 2 pieces of red felt, sandwiching them together. I left one side of the bow tie open so that I could turn the bow tie inside out. Then I did my best attempt of a blind stitch to close it up (felt doesn't iron well). I was being cheap and didn't have red thread, so I used white. I have some parts where the white is showing a little, but it not very noticable. But red thread definitely would have been better!
 
I did the same thing for the piece of the bow tie hanging down, flipped it inside out. I cut out a small strip of the red felt and wrapped it around the center of the bow tie to look like the knot of the bow tie. Hand sew that onto the back of the bow tie. Then hand sew the dangling piece to the back.
 
Hand sew the entire bow to the shirt, and done!
 
Gloves
I think WalMart sells winter knit gloves in the baby section for .99 cents. I can't remember if they had white ones or not... I feel like they did. But Ethan wanted 3-fingered gloves, like the cat. When I looked through the book... sometimes Cat has 3 fingers, sometimes 4, sometimes 5. But Ethan requested 3, so here we go!
 
I had a white t-shirt that my husband let me use for a pair of pants for a different costume. I was able to cut out enough fabric for a pair of gloves too. I outlined another pair of gloves that I already had, just for size guesstimation.

 I pinned 2 pieces of fabric together and cut it out with a thumb, and 2 fingers together on the top. Often in the book, Cat looks like he has a thumb, 3 middle fingers together, and a pinky. But I thought that would be uncomfortable and difficult to put on.

Fold the bottom hem of the gloves twice and sew.

Sew the outline of the glove. Try on for size, and adjust sizing as needed. I needed to sew closer on the fingers. Trim the excess fabric. Get especially close on the inside on the fingers.

Flip inside out, and gloves are done! Not form fitting, but good for show.
 
 
Pants
I used a template here for how to make pants out of an old t-shirt. There isn't a real tutorial on it. Basically you cut out the legs, sew the inner seam (where the crotch is). Then sew each leg shut. Sew an elastic band on the waist and hem the bottom. Pants done!
 
I had to think of a way to have a tail, but still have it comfortable. We plan on going to a couple harvesty events, and I didn't want his tail bothering him while in his car seat. I decided to make it detachable with a button. Sew a button on the back of the pants on the waist band. He doesn't seem bothered by the button. Then you can attach the tail for show.
 
Now buying a $3 pair of Granimal pants from WalMart would have been much easier! But I wanted plain, black pants. Everything has a design or stripe down the side. This wasn't that hard, and made from an old t-shirt.
 
Tail
 

Sew 2 pieces of fabric together, with a rounded end for the tail. This will make a tube. Flip it inside out and stuff it with poly fil.
 
I found out the hard way that the fabric I had on hand would leak of fuzzy pieces of poly fil. So I took all the stuffing out, and put a plastic inside the tail, and then re-stuffed the tail. It's a crunchy-sounding tail now. Oh well! And it doesn't have white fuzz seaping out anymore.
 
Leave the opening of the tail without poly fil. You can do a blind stitch to close it up. I just did a single stitch with the edges folded in to make for a nice seam. His shirts hang over, so you can't really see the stitching anyway. Then sew a button hole to attach the tail to the back of the pants.


Wednesday, September 26, 2012

Chick-fil-A Birthday Card

 
Happy 1st birthday to our local Chick-fil-A. Bring in a birthday card, get a free sandwich. Had the cutest cow image on the Cricut, and was able to use a bubble to make a cute saying. We all signed the back, and it's still hanging in the office at the store :) I guess they liked it too... But maybe they're biased! Ha!

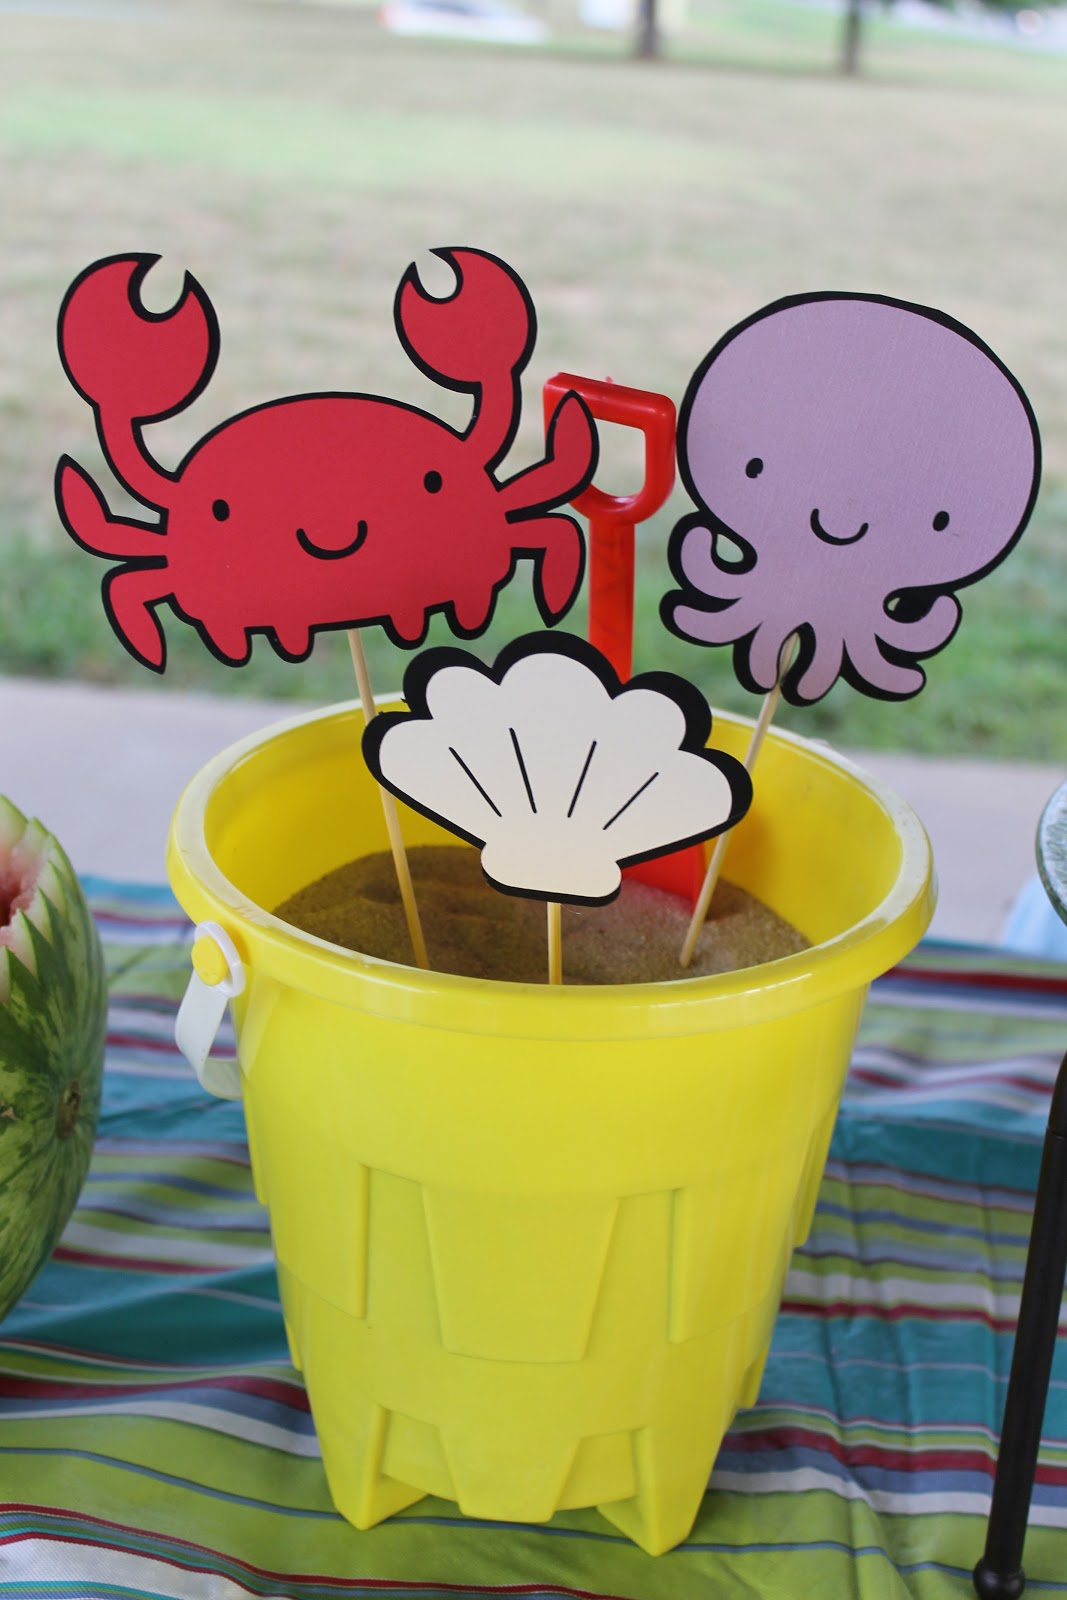
Beachy Centerpieces

One of my mom groups was doing a kick-off with games and food. Our theme was "Plunge" so I made some beach-theme centerpieces.
 
It didn't cost me anything either! I already had the pails and shovels from the mom group. Got the sand from my boys' sandbox, used BBQ wooden skewers I had in the drawer, and paper from my scrapbook stash. Used the Cricut to make cute sea creatures. I thought they turned out adorable!


Tuesday, September 25, 2012

Spider-Man Re-Purposed Lawn Chair

I bought this kids lawn chair at a garage sale for $1. I usually see them in the store for about $5.99-$9.99. It's Superman, someone that my kids don't really know. But I thought for a buck, it will be nice to have an extra chair outside when we have friends over. Turns out, I bought some Spider-Man stickers for a birthday banner and I was going to have a ton of stickers left over. Thus, light bulb! The chair was already red, so I decided to take something old, and make something new!

 
I traced the shape of the cut out on the back of the chair. Then I cut it out, fitting the paper as closely as I could to cover up the image. I put a few Spider-Man stickers on the paper and took the paper outside.

Clear, non-glare/glossy contact paper has many uses! I cut out a shape slightly bigger than my traced shape. I peeled the backing off and put the picture on the sticky paper, Spider-Man side down. Then I trimmed the edges to about a 1/4 inch.
 
I use this adhesive for scrapbooking. It can be pricey, but I always have a 40% coupon! I sprayed the back of the paper outside. Line it up and press down... Voila! A Spider-Man lawn chair. 


Monday, September 24, 2012

Spider-Man Cake and Birthday


Ethan is 4! And he picked Spider-Man theme about 3 months ago :) I made a double layaer white cake with strawberry filling (his favorite fruit!) and strawberry ice cream. I made the quick icing and added food coloring for icing and piping. I got the figurine from the Dollar Tree!


Made a banner (of course!)
 
3 handsome masked boys!
 
Happy Birthday Spider-Ethan
 

Thursday, July 12, 2012

Photo Alphabet


This has been a project in the making for months! I saw it in a Costco Connection magazine. I bought alaphabet stencils and traced them onto poster board. I picked photos that would be a good display through the letters (the space needle, the gateway arch, scenic photos from our vacations, etc). I used a craft blade (like an Xacto knife) to cut out the letters and backed each letter with a different photo.

Sunday, July 8, 2012

Chick-fil-A Shirt

 
Chick-fil-A had a Cow Appreciation day coming up. Anyone can come in wearing their best cow attire and receive a free chicken sandwich. If you come in dressed from head to toe in cow pride, you get a free meal!

My youngest son fell in love with cows when my husband first started at Chick-fil-A. So I made him a cow shirt, seen here. We always like to participate in fun activites, especially when something FREE is involved! So I needed to make a cow shirt for my older son. Same technique, fabric paint and freezer paper. The tutorial is found here.

I created a template in Word. I tried to find a font that looked similar to the Chick-fil-A signs. The font I used was Half Darm BTN. For the heart, I used webdings (shift and y). I used white fabric paint for the lettering. For some reason, Hobby Lobby was out of red fabric paint. So I used the puff paints and spread it out with a paint brush. It was a little harder to remove the freezer paper. I used my blade to gently cut the paper away. I would definitely recommend fabric paint though, I didn't like how it turned out as much.

 
I painted little cow spots on the boys' faces. Too cute! Next year I am going to get white shorts and shirts and do them up in full cow suits, with a tail :)

Saturday, June 9, 2012

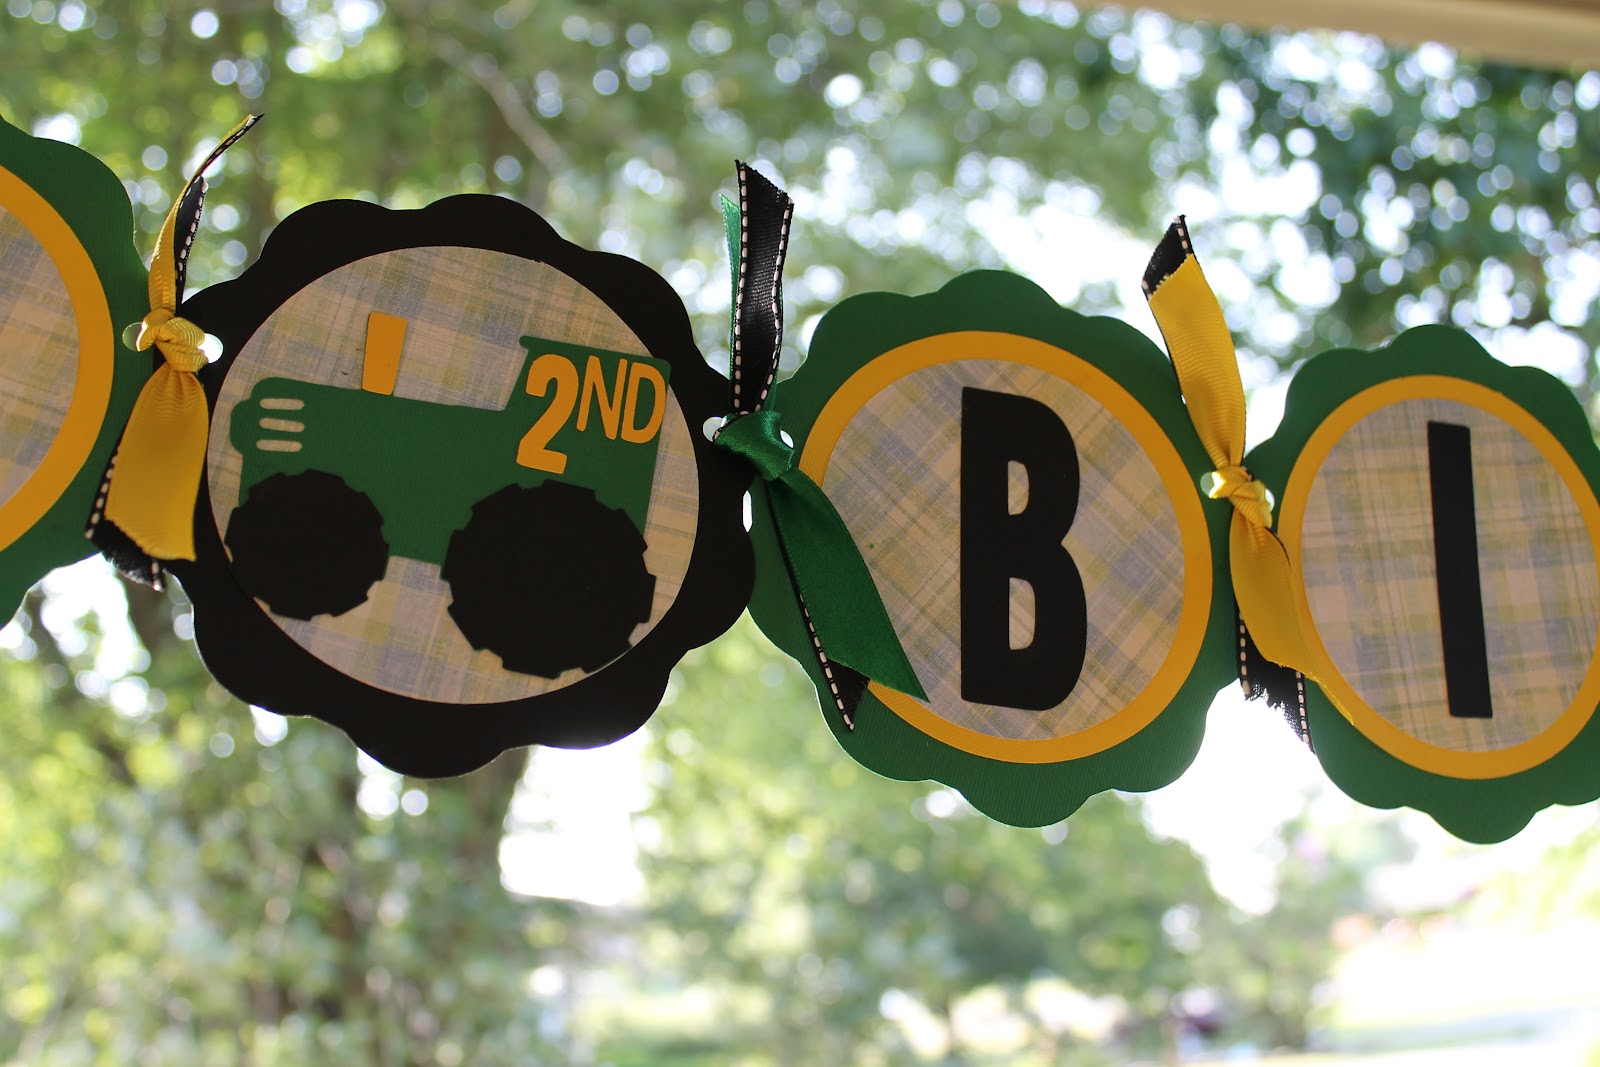
John Deere Themed Birthday Banner


I finally put my Cricut to good use! My sister-in-law always finds the cutest personalized things for her son. Last year, he had an Elmo birthday party. And when I saw the decorations, I thought to my crafty-self, "I could so make that!" She told me they were hand made and bought on etsy.com. I got a Cricut for my birthday (Yay!) and couldn't wait to make something. With only a few weeks until Euan's second birthday, I still hadn't thought of a theme! During a play date at the park, a lawn mower went by and Euan got so excited. He loves lawn mowers! He likes to ride on them with daddy, or have daddy hook up the trailer or wagon and ride around. And it clicked! John Deere birthday! I fould a cartridge for the Cricut on eBay, got themed paper and ribbon on sale at Hobby Lobby and I was ready. Everything turned out absolutely adorable! I think I am going to start my own esty.com business :)
 
(And I did! My Handmade Workshop. Find it here)


Happy Birthday Euan!


Double Layer John Deere Cake


Double layer cake in John Deere colors! Right before I poured the batter into the layer pans, I separated them into 2 bowls and added green to one bowl and yellow to the other. Filled with chocolate icing. It had been at room temp. for a while, and the green icing had a little too much butter... so the cake looks like it's melting! Oops! But it still tasted yummy and was so festive. Loved it!

You can see the top of the cake here.

John Deere Birthday Cake


Euan had a John Deere themed birthday for his 2nd birthday. I bought a cake topper set off eBay for $9. It's an actual John Deere tractor rolling toy, which was a bonus! Except, I later bought Euan a couple of John Deere sets and probably could have used those for the cake. Oh well.... the trees and fence added something to the cake!

I made the 4 Yolk Gold double layer cake recipe from the Joy of Cooking cookbook. Before I filled the layer pans, I divided the batter into 2 bowls and colored one with green dye and the other with yellow dye. You can see what the inside looks like here.

I was going to filled with the whipped ganache recipe, but didn't realize that it needed to be refrigerated for several hours, and the party was later that night! So I used store bought whipped chocolate icing for the filling and the "dirt".  The rest of the cake is iced with the Quick Icing recipe, dyed green for the grass and border, and yellow of the font piping. I used a little bit too much butter in the green icing. The result was a more runny icing... BOO! It still tasted delicious!

Tuesday, April 10, 2012

Newspaper Seed Starters

I saw this and thought it was an awesome and cheap way to start seeds. I have SO MANY newspaper from couponing and thought this was a cool way to re-use them. Although, it only used like 4 sheets :) It will break down in the garden when transplanted.

Here is the tutorial I followed: http://www.instructables.com/id/Biodegradable-Seed-Starters-From-Newspaper-anothe/

I used old cereal boxes to hold the starters and lined with saran wrap to try and keep the cardboard from getting wet. (I was being super cheap, this was a free starter!). I see some moldy spots... yikes! But just on the paper, so not too worried about it. I think I would try a waterproof container next time, just didn't have anything lying around that would fit on my window sill.

The tomatoes did great! Basil did well, as well as some of the other herbs. Some didn't germinate at all. I did have Ethan plant the seeds :) So I will do another starter set soon.

I want to try making seed blocks next time. No need for paper=no mold. I can get the plastic clam shells from my husband's work (hopefully!). Here's where to find that tutorial: http://www.instructables.com/id/Make-Super-Cheap-Seed-Starters/http://www.swagbucks.com/?t=w&q=&p=1&b=1